ONLINE STORE
Category Search
General Search
Search description
|
Search item number
|
|
|
Camp Crafts Guide
9 - Stamping Pointers
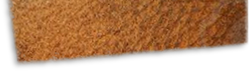
- Tooling leather does not stamp well when too wet. When you stamp a design on moist leather,
you should get a GOLDEN BROWN COLOR. This golden brown color indicates
proper moisture content in the leather. Plastic squirt bottles or
sponges work well for dampening your campers' leather projects.
- Have some examples or samples to show campers what they can build
and how to do it. Display boards can show step by step directions.
- Double impressions are MISTAKES that can be CORRECTED by rewetting
the leather (in this case quite wet / soggy). Then smooth the impression with a modeling spoon
or pear shader tool. Let the leather dry out a bit before re-stamping.
- An Alpha-Imprinter Machine is great for stamping the 3-D large
stamps and letters. This machine virtually eliminates young campers' double impressions, and is
a worthwhile investment for your camp. Mount on wood frame so that it can easily be moved, or
C-clamp to a table in the handicraft area.
- Stamp names and LARGE impressions (8300
3-dimensional stamps) FIRST. Then add other stamps to create border designs.
- A HARD SURFACE such as marble is the best surface for campers to
stamp onto. This will improve the quality of the campers' efforts and projects.
- PUNCH HOLES only using poly punch pads or rubber "poundo" boards
underneath, to protect marble, tables, floors, and tools.
DISPLAY BOARD IDEAS
| How
to do leather - Easy as 1, 2, 3 |
- WET LEATHER (careful - not too much)
- STAMP DESIGN (border designs look best)
- ADD COLOR (if desired - antique or dry block)
- APPLY SEALER (super shine to protect / beautify)
- ASSEMBLE (add rivets, snaps, lace, etc.)
|
| Making
Leather Bags (Medicine or Possibles) |
- Cut out leather - suede or deerskin (use pattern when possible)
- Align parts together. Rabbit skins are assembled fur side together.
- Punch holes with awl or loopuyt needle.
- Sew with simple whip stitch or straight stitch using wax thread or sinew.
- Cut and add fringe if desired.
- Attach shoulder strap or neck thong.
|
|